
(Guide written by ShobuBlaze)
Once you've decided you want to move on from the free trial to the full version of the game, you'll want to follow this guide. This part can hit a lot of snags and has gotten a lot of people stuck. Make sure you read everything in this guide CAREFULLY.
This guide covers purchase and subscription of the PC version. The Switch and PlayStation 4/5 versions are not covered here.
The recommended method for purchasing the game is Amazon Pay. You will need to create a new, Japanese Amazon account which will be detailed later in this guide. Using Amazon Pay allows you to use a non-Japanese debit/credit card, and they do not charge a currency conversion fee or upcharge. There are other ways to buy the game, such as physically through a seller like PlayAsia or through the Japanese Square Enix E-Store. These methods are not covered here.
As far as subscribing to the game, Amazon Pay generally is the easiest option, but this can be known to have some hiccups. There are alternatives listed later in this guide you can use if Amazon Pay doesn't pan out after purchasing the game.
Remember—you cannot subscribe until you purchase and register the game first! Be sure to follow this process in order!
Setting Up Amazon Japan Account
The first thing we'll need to do if we plan on using Amazon for AmazonPay or for purchasing the full game is to make a Japanese Amazon account. This will have to be a new account separate from your regular Amazon account if you have one already.
Go to Amazon JP and create an account.
After creating, log in and if you want to change the site to English, click the Japan flag and you can set it there by selecting EN.
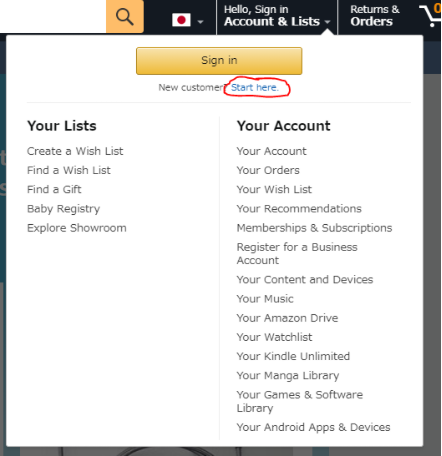
Mouse over "Account & Lists" at the top right, and click "Your Account".
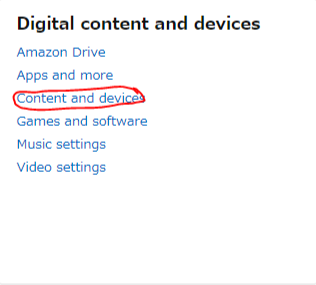
Under, "Digital content and devices", click either "Content Library" or "Devices".

Click the "Preferences" tab.
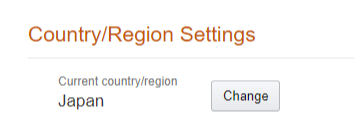
Click Country/Region settings and then "Change".

In the “Country of residence” window,
enter a valid Japanese address here. You’ll
have to look up a Japanese address, ZIP code, and enter the
correct prefecture.
It can be any address, but it must be valid with proper
formatting, or else Amazon will not accept it.
This is the point of the guide that trips the most
people up and usually causes the most issues with
ordering as finding a properly formatted Japanese
address may be difficult to find.
If you're having trouble finding one or don't know how to
enter one properly, it is HIGHLY recommended to sign up for a service like
Tenso and register for an
account. Once you do, you'll be given your own shipping address
used for online purchases, which can also be used here. See
below for an example:
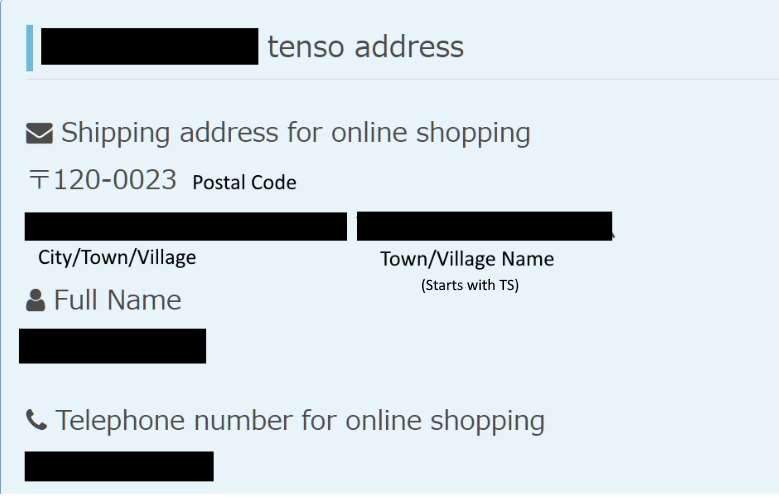 The City/Town/Village and Town/Village name portion together
counts as a single address, so use that for the Address Line 1.
Use "Tokyo-to" for the Prefecture. Everything else can be filled
in with the information displayed on the main Tenso page as seen above.
The City/Town/Village and Town/Village name portion together
counts as a single address, so use that for the Address Line 1.
Use "Tokyo-to" for the Prefecture. Everything else can be filled
in with the information displayed on the main Tenso page as seen above.
Go to Your Account > Your Addresses.

You should see the address you entered in the previous step already here. Be sure it is set as default. Next, you'll need to create a second address that is your credit/debit card's billing address. Do so by clicking the "Add Address" button. The "Your Addresses" page will have two addresses and look like the image above.
Next, add your card by going to Account > Payments > Wallet. Make sure to select YOUR billing address as the card’s billing address.
You’re done! This was the hardest step of the guide.
Purchasing the Game (PC Digital Version)
The next step is to actually purchase the game. This will consist of two steps: purchasing Amazon gift balance and then the game itself. The reason we are using gift balance rather than buying the game directly is that Amazon is known to lock accounts for suspicious activity if trying to purchase directly with a foreign payment method. Buying gift balance is a known way to get around this.
First, log into your account on Amazon JP.
Next, head to the DQX All in One Package page, which is located here. Leave this page/tab open for now.
After that, head to the Amazon Gift Card Charge page here. You will see the page below.
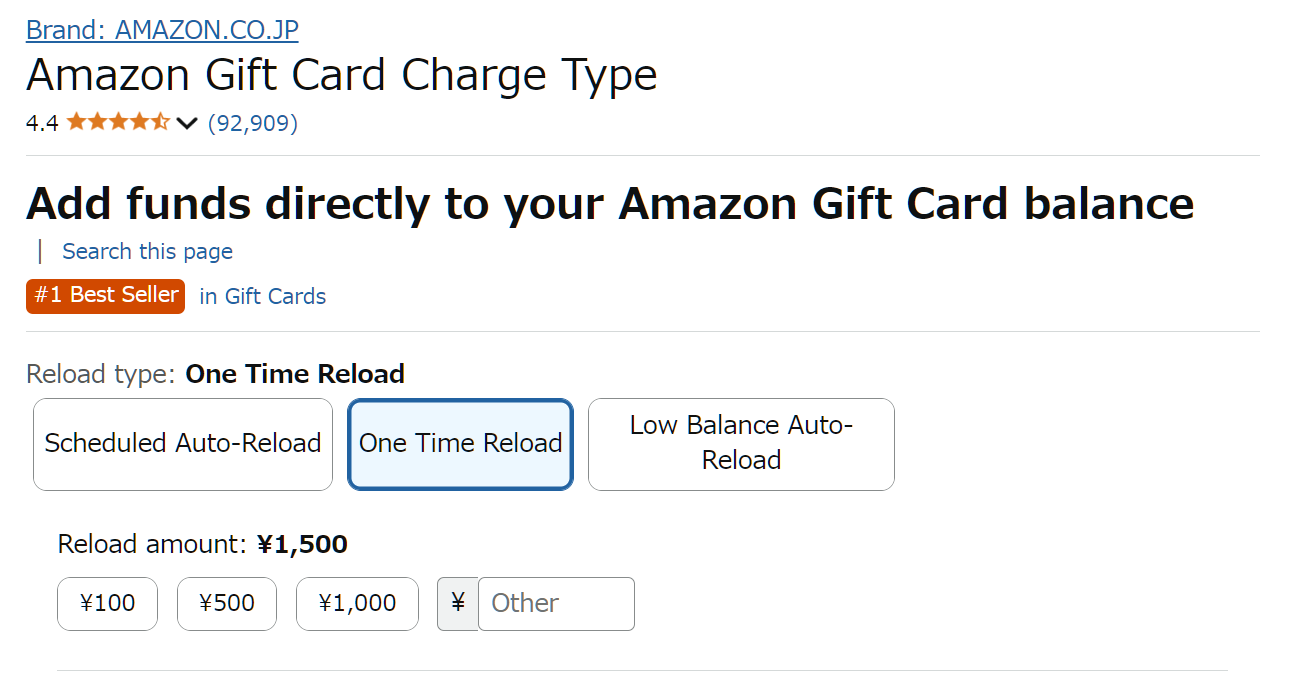
You're going to want to make sure "One Time Reload" is selected. In the "Other" box below it, you will want to put an amount in yen equal to the price of the game. You can see the game's current price on the window you opened above. Click Buy Now on the right side. This might take a few minutes to go through, so be patient.
NOTE: While rare for gift balance purchases, if your order is taking long to go through, there's a chance the order may be canceled. This could be due to several reasons. One is that the address under Country/Region settings isn't correctly set to Japan. Another reason is that your bank sees this unknown foreign charge, and blocks it because they think it is fraudulent. Contact your bank and let them know that this is a legitimate charge, and try it again. If none of these options work, try submitting an order again. Sometimes it might take a few tries to go through.
Now that you have gift card balance, return to the DQX All in One Package page and click Buy Now. Be sure to use your gift balance when finalizing your purchase. It might take a while for the order to process and go through, so keep checking your “My Orders” page. This can take a few minutes to a few hours.
Once the order goes through, hover over “Account & Lists” at the top right of the page, and then click “Your Games & Software Library.”
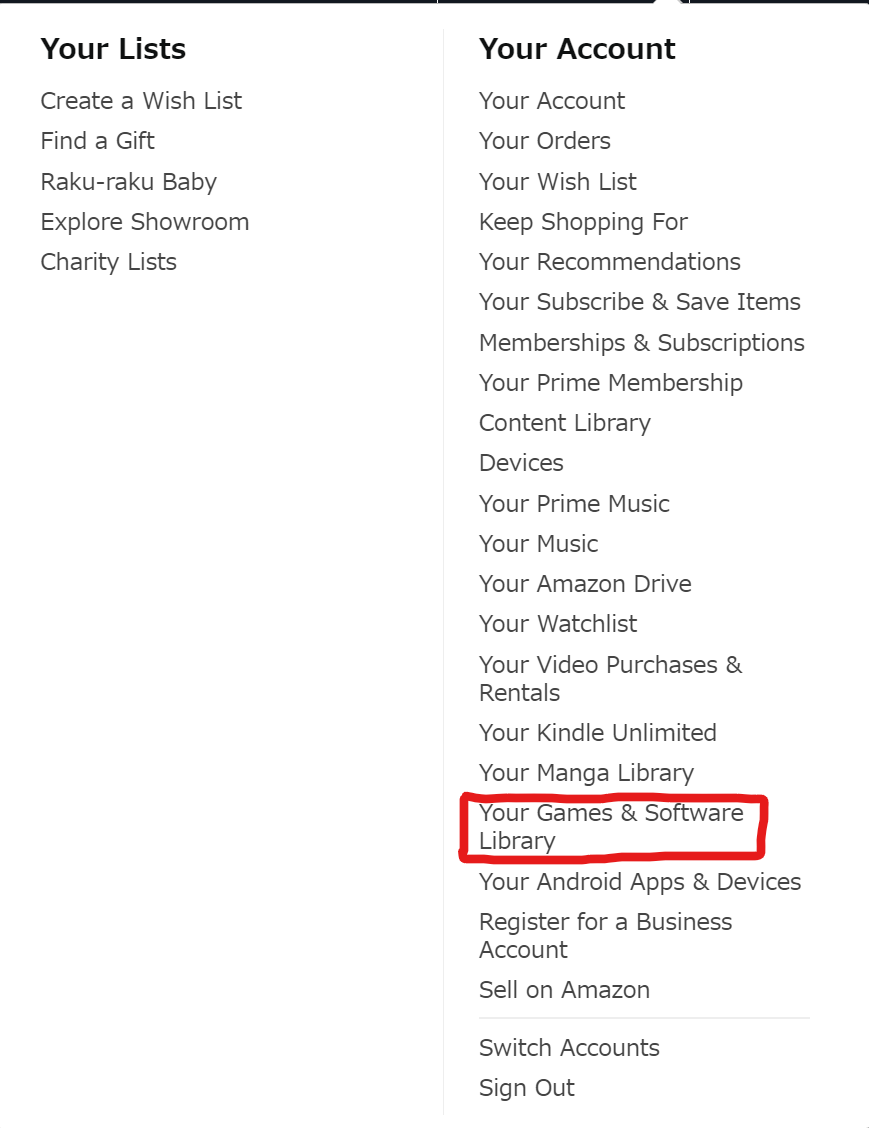
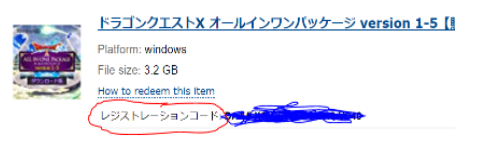
You’ll see the game and also see the registration code. Note this down.
Log into your account at the Square Enix Account Management page, and click the DQX logo at the top.
You will automatically be brought to the registration code page. Enter your code into the boxes and then click OK. You're all set!
Lastly, you'll need to download the additional game data
necessary for full accounts.
You can do this buy clicking the yellow "Download" button
located next to the registration code on Amazon. Alternatively,
you can download them from
here. Once downloaded, make sure to EXTRACT the files to an easily
accessible location, like your desktop or Documents folder. Once
extracted, run the Setup.exe file inside the
extracted folder. The setup relies on this folder structure, so
do not move any of the folders or files inside.
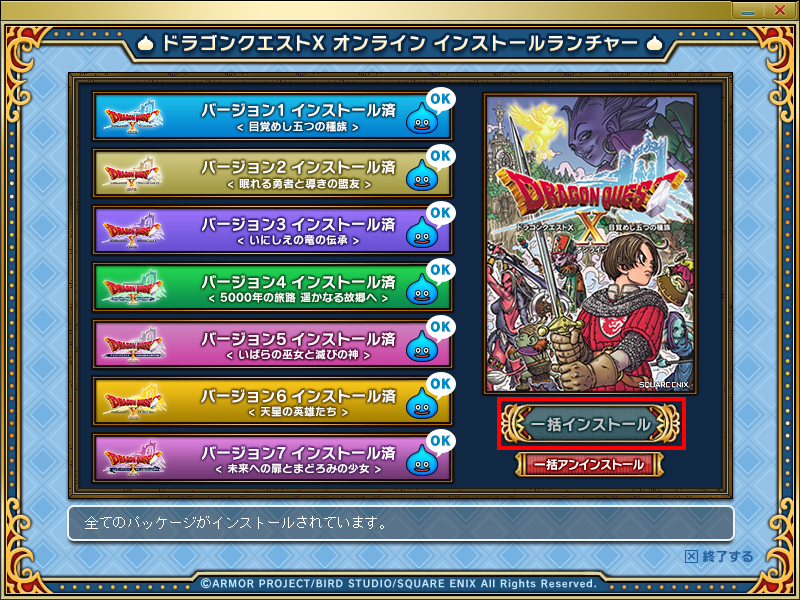 Once you see the setup, click the blue button highlighted in red
from the image above. The install process will automatically
install each version, so just follow the prompts on screen. You
will know all versions are installed when you return to the
setup above and "OK" is next to each version. You can now close
the setup. Congrats, you now own the full game!
Once you see the setup, click the blue button highlighted in red
from the image above. The install process will automatically
install each version, so just follow the prompts on screen. You
will know all versions are installed when you return to the
setup above and "OK" is next to each version. You can now close
the setup. Congrats, you now own the full game!
Setting Up Square Enix Account Address
After purchasing and registering the game, you'll be given 20 free days of play time. After that, you'll need to set up a subscription. Before you can do that, you need to register an address on your Square Enix account.
Log into your Square Enix account here. You'll see the screen below.

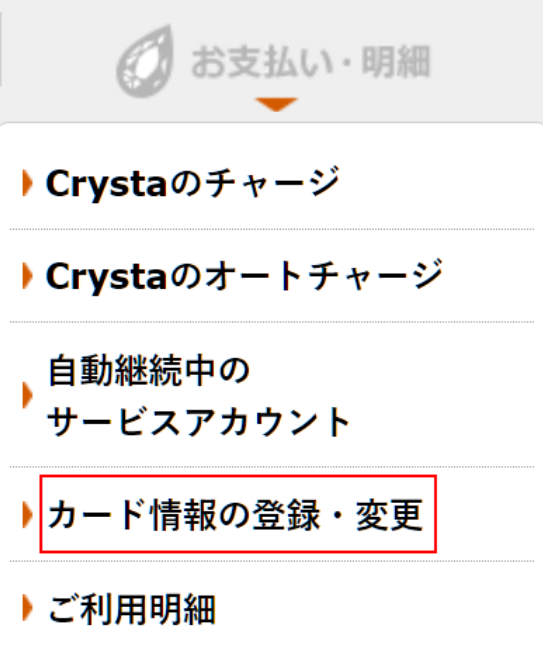
Hover over the second option at the top that says お支払い・明細, and select the fourth option in the drop down menu.
The next screen will have you enter in your address. It looks daunting, but it's simpler than it looks.
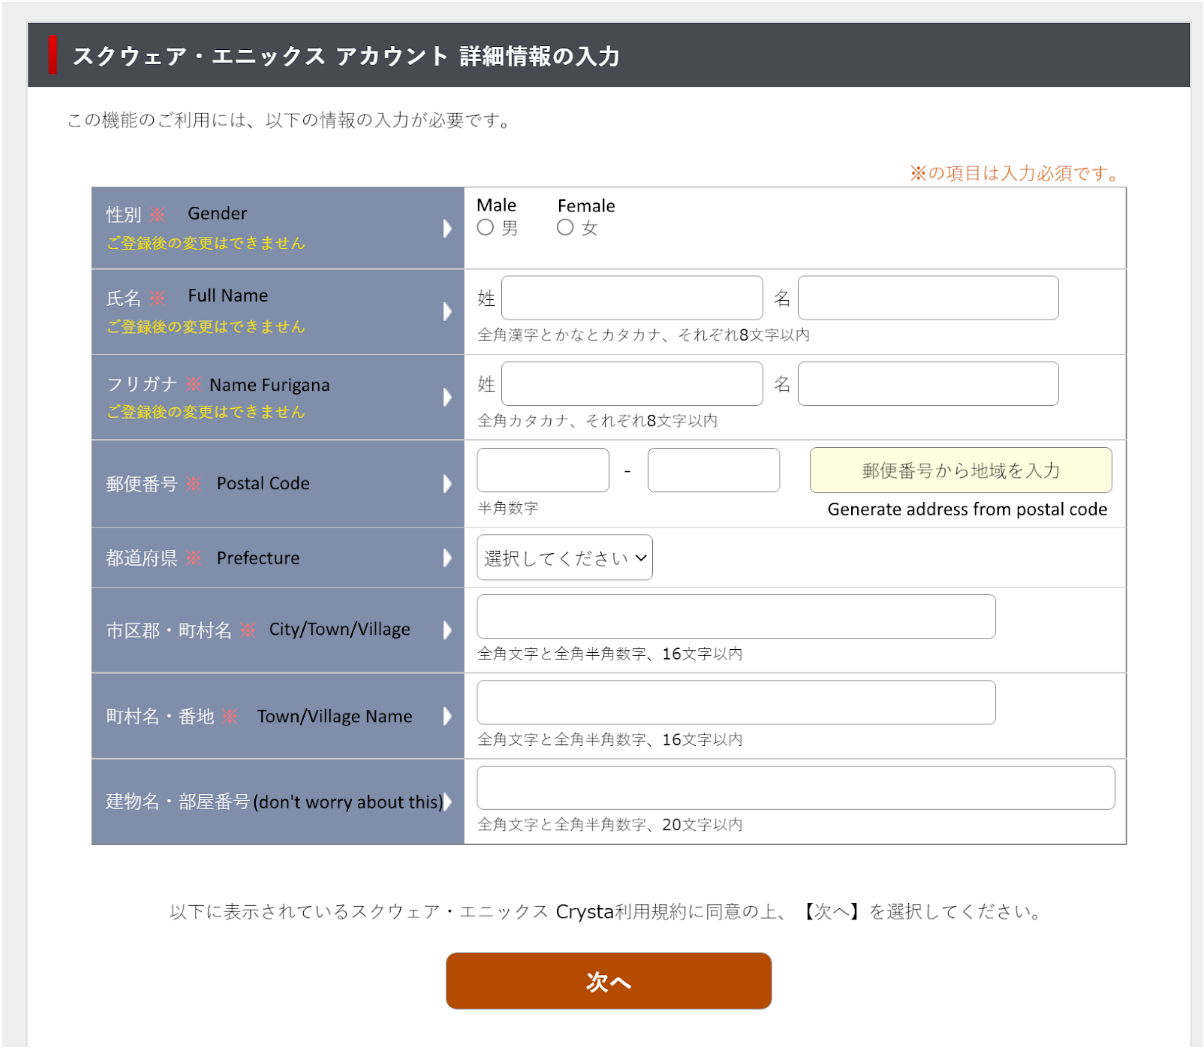
The only fields you need to manually fill yourself are the "Gender", "Full Name", "Name Furigana", and "Postal Code".
For the “Full Name” and “Name Furigana” sections, it’s best to use a katakana name for both. You can look those up easily online, or just Google translate. For example, if your name is “Smith, John” you’d use スミス and ジョン for the first and second name boxes, respectively. (Feel free to use this John Smith example if you'd like, it doesn't actually care so long as the name itself is valid.)
Next, enter a valid Japanese zip code in the box (for example, 100-0004) and press the yellow "General address from postal code" button next to it. (You may use this example too, if you wish.) The Prefecture, City, and Town boxes will auto fill. Afterwards, click the orange “Next” button at the bottom to complete address registration.
The next screen will show a confirmation of your address settings. Press the orange button once again to finish.
Setting up a Subscription (AmazonPay)
To subscribe to the game using your Amazon Pay payment method, use this portion of the guide. Note that this method of subscription is non-recurring. If you want a recurring subscription with the option of optional paid features (such as additional bank storage), see the Crysta subscription section below.
To get started, log into your account at the Astoltia Immigration Bureau page here.
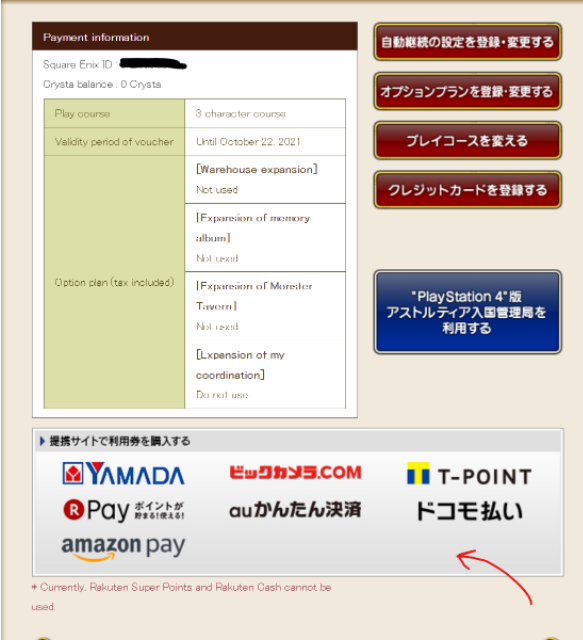
On this next screen, click the gray rectangle that has “Amazon Pay” in it. If you do not see this, then it is likely the daily period where third-party vendors cannot be used to subscribe (from 11pm to 12am Japan time).
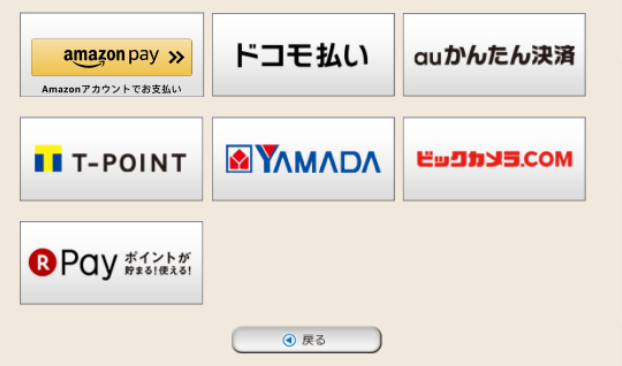
On the following screen, click the "Amazon Pay" button. You'll be taken to Amazon briefly to confirm your payment method. Press the yellow button at the bottom of the screen to confirm.
Choose the length of time you'd like to subscribe for, and hit OK.

You’ll be taken to the confirmation page. Click the button circled in red. Congratulations! You’re subscribed!
NOTE: Some players have reported this method doesn't work (the purchase gets an error and does not go through). If you find yourself in this situation, you may utilize the gift balance method detailed in the Purchasing the Game section. Otherwise, it's recommended to use one of the other methods below.
Purchasing Crysta
Crysta is a currency you can purchase on Square Enix to use for subscriptions and buying items in the cash shop. Crysta is required for recurring subscriptions and option plans. Crysta may be purchased with Amazon Pay or prepaid WebMoney cards. You cannot purchase Crysta with a non-Japanese debit or credit card directly.
Log into your account at the Square Enix Account Management page here.

Select “Crysta charge” from this menu.
The next screen will allow you to charge Crysta.
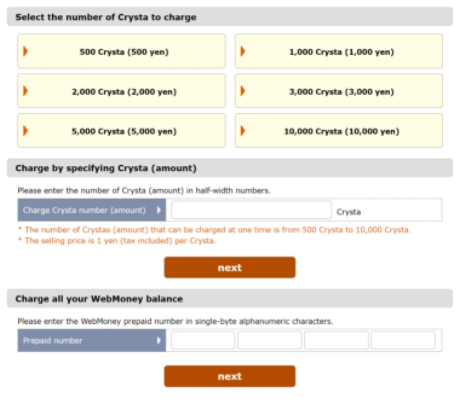
If you wish to use Amazon Pay, either click a pre-set number of Crysta in one of the boxes, or enter in the amount you want to charge and click "Next". If you have a WebMoney card, enter its code at the bottom and click "Next".
Success! You now have Crysta to spend.
Setting up a Subscription (Crysta)
Log into your account at the Astoltia Immigration Bureau page here.
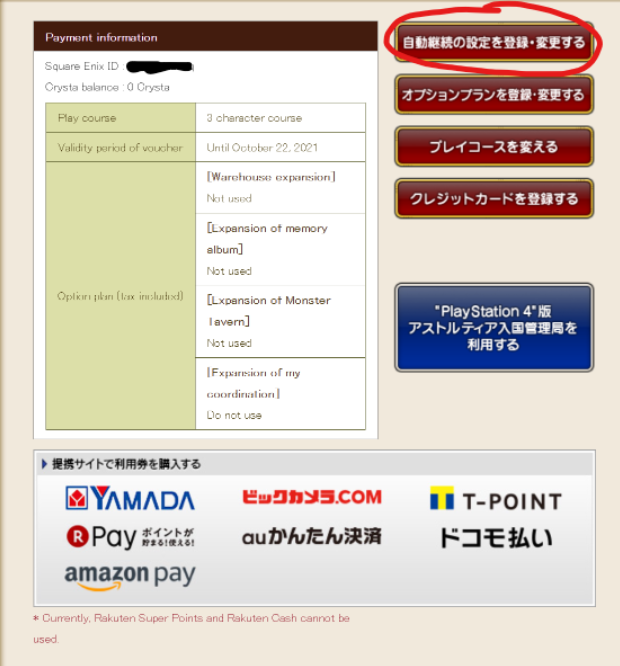
Click the button circled in red.
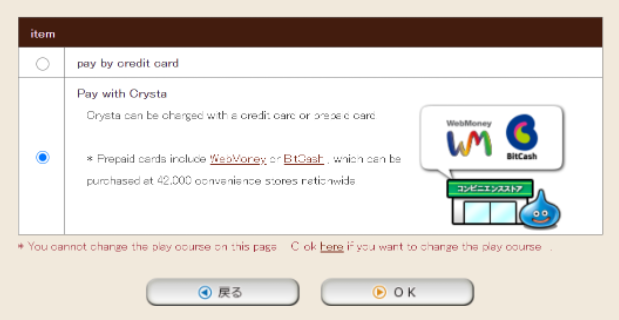
Select the "Pay with Crysta" option.
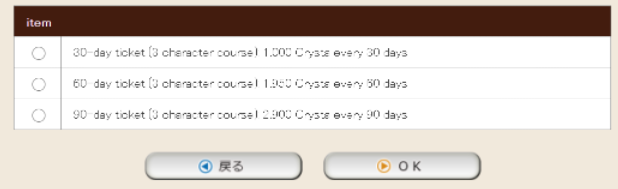
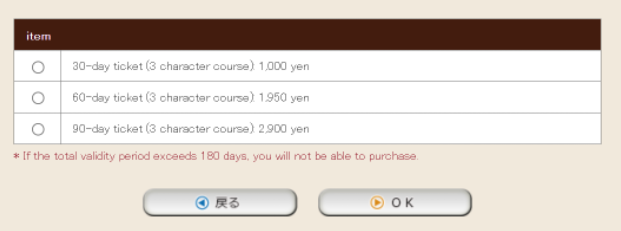
Select the length of time you'd like to subscribe for, then click "OK".
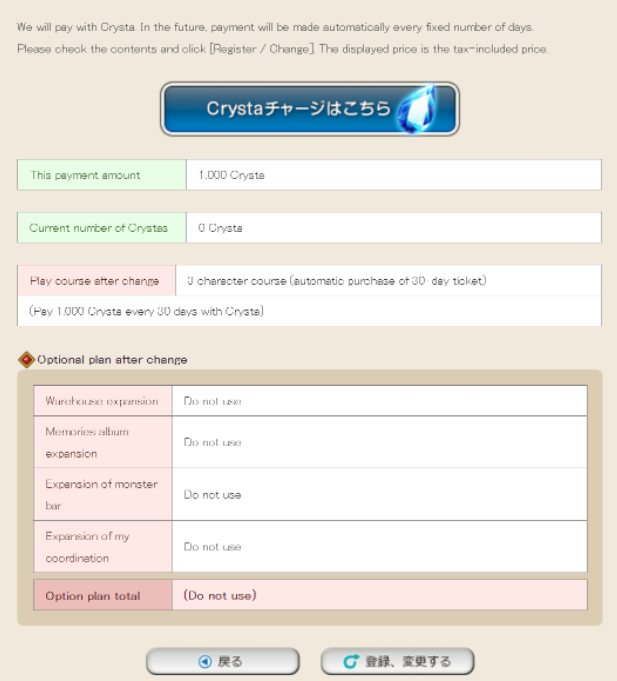
On the next screen, it will ask to confirm. Hit the right button, and you should be good to go.
Success! You're subscribed!
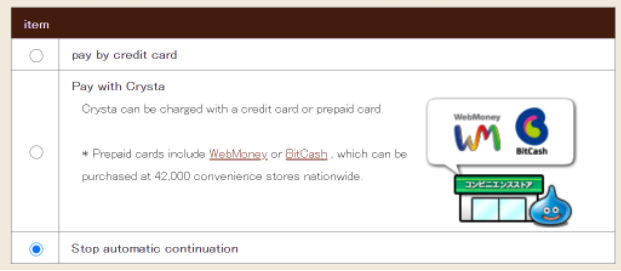
NOTE: By default, the game is set to do an automatic Crysta renewal at each time interval you chose above. If you do not have enough Crysta in your account when your account goes to renew, your subscription will cancel. If you'd like to cancel this auto renewal yourself, you can click that red button in the image above again, and then select this option.
If you'd like to re-enable automatic continuation, you can go through the steps above to re-enable it while you still have an active subscription remaining.