
DQXClarity is the main translation tool for Dragon Quest X, and allows a large portion of the game to be translated into English with a few simple set-up steps.
DQXClarity exists in two parts: a translated data file that overwrites Japanese text in the local game client, and a program that translates text sent from the server (such as NPC text, player names, and monster names) on the fly using an API service. Using both of these parts in conjunction will give you the best English experience.
Before you can use the DQXClarity program, you must register for an API service, which is detailed below. Please read all the steps very carefully.
Obtaining a DeepL API Key
NOTICE: CURRENTLY, DEEPL IS ONLY AVAILABLE IN CERTAIN COUNTRIES. YOU CAN CHECK HERE TO SEE IF YOUR COUNTRY IS CURRENTLY SUPPORTED. A CREDIT CARD IS REQUIRED FOR VERIFICATION PURPOSES. YOU WILL NOT BE CHARGED, IT'S ONLY TO VALIDATE NEW MEMBERS WHO USE THEIR API SERVICE.
A majority of Dragon Quest X's NPC dialogue is sent via their server, so it must be translated dynamically through a translation service. To use DeepL as this service, you must first sign up for a DeepL account in order to obtain an API key. If you're uncomfortable providing these details, you may consider using the Google Translate API as an alternative to DeepL (detailed here), however, DeepL is widely accepted by the community to be superior, and will be the only method covered in this guide (as of now). You can get more information on their GitHub or in the Discord server posted in the introduction.
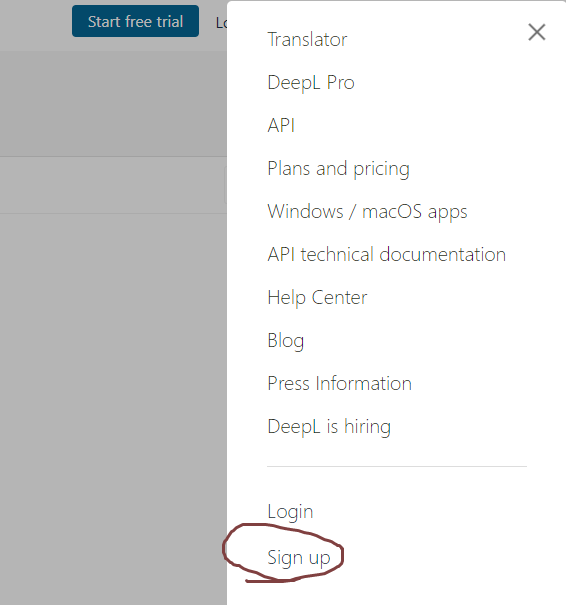
Go to DeepL's Site and click "Sign Up" under the sub-menu in the top right.
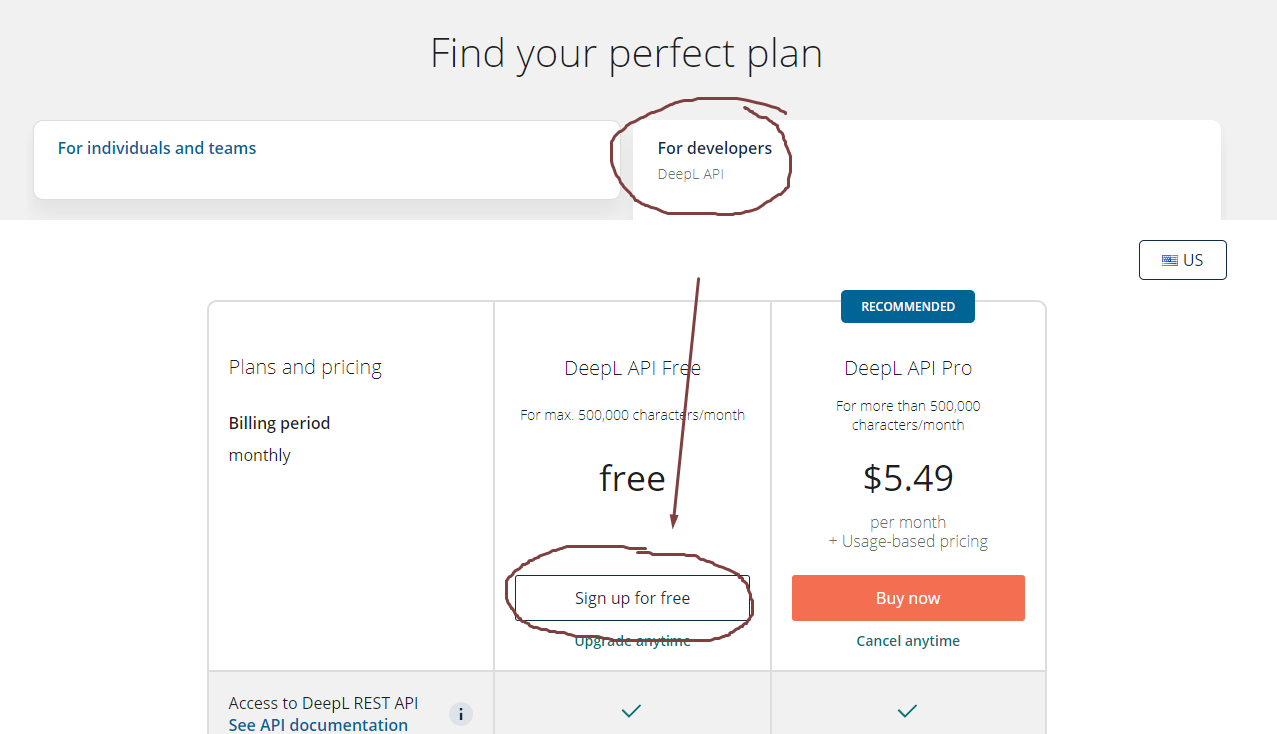
On this page, scroll down and click on "For developers", then click "Sign up for free" where indicated.
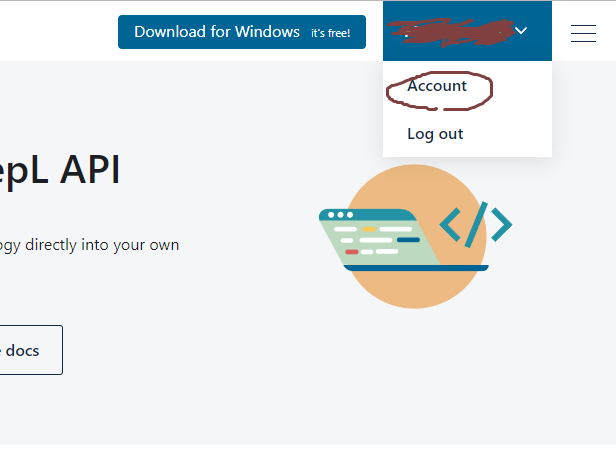
Continue with the rest of the sign-up process. Once you've completed the sign up with accurate information and have been verified, Click your name in the top right and select "Account".
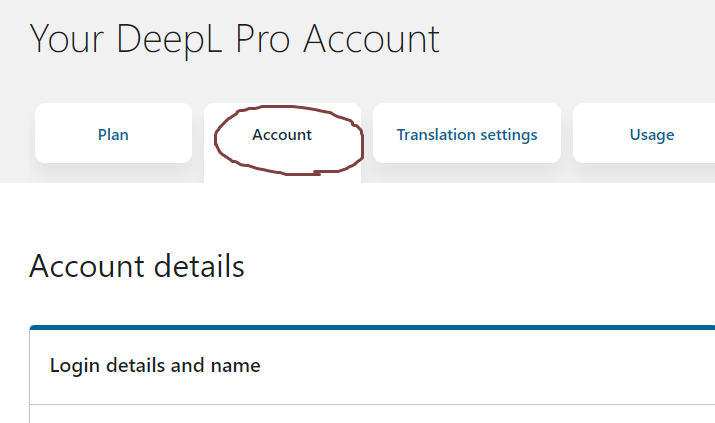
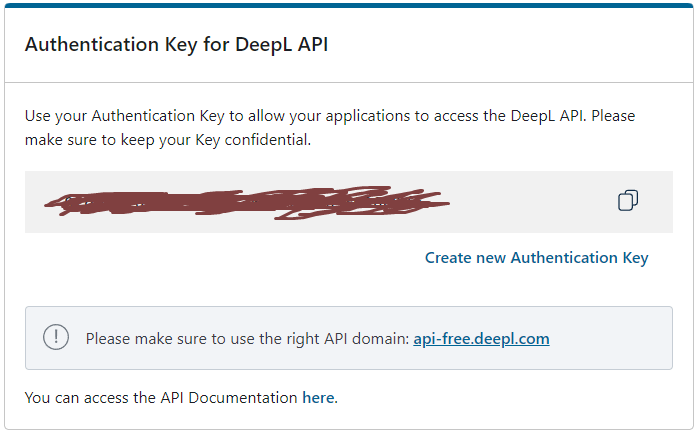
Click on the Account tab.
Scroll down the page and look for your Authentication
Key.
Copy this somewhere.
NOTE: If the text above your Authenication Key says
"Authentication Key (DeepL API and CAT Tool Integration)",
you have signed up for the wrong type of account and
your key will NOT work with Clarity!
Congratulations! You've completed the hardest part of setting up Clarity's translation.
IMPORTANT NOTE: If you choose not to use an API, a majority of NPC dialogue in Dragon Quest X will remain in Japanese. You have been warned.
Installing DQXclarity
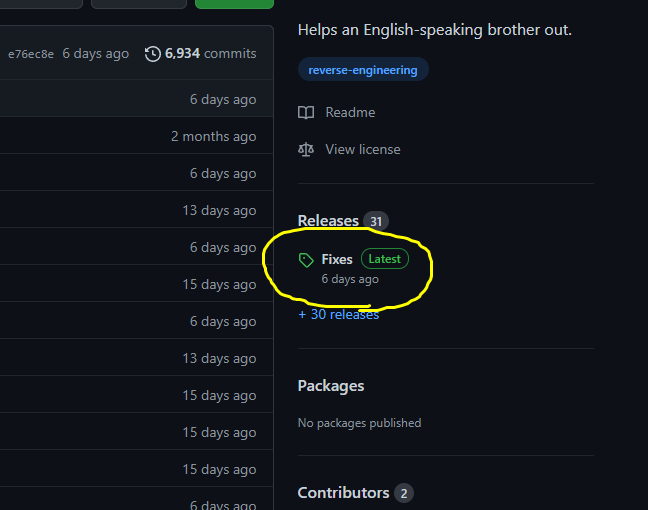
Go to DQXclarity's GitHub page and download the latest release from the releases tab. Make sure the release is tagged "Latest" and not "Pre-release". Download the dqxclarity.zip file. Do not download the source code files as they are empty.
READ THE README. OUR ABILITY TO HELP YOU IF SOMETHING BREAKS DEPENDS ON IT.
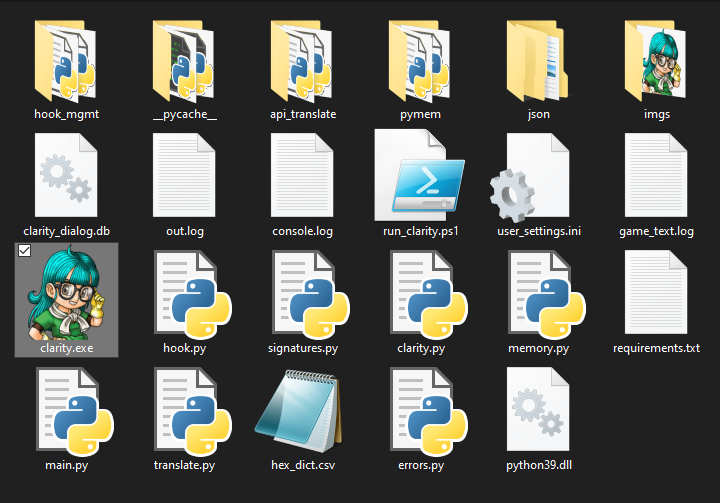
Extract dqxclarity.zip anywhere except the Program Files folder and locate DQXclarity.exe
Run DQXclarity.exe as an adminstrator. You can do this by either right clicking the exe -> Run as administrator, OR right click the exe -> select "Properties" -> click the "Compatiblity" tab -> check the "Run this program as an administrator" box. (This is necessary to download necessary game files.) Once it opens, you will see this GUI.

There are multiple options here that function as follows:
-
Translate Player Names: Allows Clarity to dynamically translate visible player names.
-
Translate NPC Names: Allows Clarity to dynamically translate visible NPC and monster names.
-
Update Translated Game Files: Downloads the latest game data files which translate various elements into the game into English, such as menus, item/ability names, and cutscene dialogue. As a first time Clarity user, make sure this is checked or your game won't be in English!
-
Use API Dialogue: Checking this, in combination with the API Service Settings button described below, enables live translation of in game text that the English game files cannot translate.
-
Enable Community Logging: Logs useful information about data that is loaded while playing Dragon Quest X. This is useful for discovering new files the translators do not have yet. This is appreciated to leave on for that purpose, but it is not required. If you find your game is crashing often with this enabled, turn it off.
-
Disable Update Checking: Disables Clarity checking for updates and stops translation files from being updated.
-
Enable Debug Logging: Logs useful debug information to the console. Only really needed to diagnose/troubleshoot problems, otherwise you can just leave this unchecked.
-
API Service Settings: This is where you can set up a translation API (Either DeepL or Google Translate API), which will inject English translations directly into game dialogue. See the section above how to get an API Key! Once you have an API key, fill in the appropriate box and check the box of the service you're using (do not check both.) If your API key is valid, you will see API Functionality Enabled! displayed. Make sure you also have the Use API Dialogue option checked as well.
For the best English experience, it's recommended to check Translate Player Names, Translate NPC Names, Update Translated Game Files, Use API Dialogue and have API Functionality Enabled. Please consider having the Community Logger option checked, too.
Once you are satisfied with your Clarity settings, click the "Launch Clarity" button. A blue Powershell window will appear, and it will go through some initial setup. This may take a few seconds, so don't click anywhere inside the window. If you do not have Python installed, it will automatically install for you. After Python finishes installing, you will be prompted to select where your DQX installation is.

A window will appear to select the "DRAGON QUEST X" folder wherever you installed the game. By default, this will be C:/Program Files (x86)/SquareEnix/DRAGON QUEST X. Navigate to this location (or wherever else you chose to install it), select the folder, and then click the "Select Folder" button. If you did this correctly, Clarity will continue and you will see this message appear in the Powershell window after a second or two:

Once you see this message, use the open launcher to log into your account. Make sure your account is selected on the top list on the left side of the launcher. Once logged in, you should see the message below appear in English:
If this is in English, success! You now have the English files. After moving on from this screen, you'll see this screen below:
This is when Clarity will activate itself.
It should take no more than a few seconds. If you see this
message below in the Powershell window, Clarity has
successfully activated:
 Keep the Powershell window minimized and enjoy Dragon Quest X!
You can now press Enter to head to the main login screen.
Please note that you will need to run Clarity again in
this fashion during each play session.
Keep the Powershell window minimized and enjoy Dragon Quest X!
You can now press Enter to head to the main login screen.
Please note that you will need to run Clarity again in
this fashion during each play session.
NOTE: If Clarity's Powershell window is
automatically closing itself before finishing or spitting
out some kind of error, PLEASE CAREFULLY
READ THE TROUBLESHOOTING SECTION DETAILED
HERE.